Hello creative friend! You’re probably here because you’ve discovered the wonderful world of printable stickers. You love the variety of unique designs out there, how affordable they are, and the convenience of instantly downloading your new stickers to print and cut at home — no waiting for mail delivery! But now you’re wondering exactly how to print and cut printable stickers at home. Well, that’s what I’m here to walk you through step-by-step.
10 Tips to Print and Cut Printable Stickers at Home
Choose High-Quality Printable Stickers
Let’s start with one of the most important steps: choosing the right printable stickers. If you want great-looking stickers, you need to start with high-resolution files — 300 dpi is a great standard to aim for.
Printable stickers can come in different file types, but at minimum, I recommend choosing designs that include PNG files with a transparent background. These work perfectly whether you’re using a Cricut, Silhouette, or cutting by hand. All of the printable stickers in my shop, including my printable planner stickers, are high-quality and beginner-friendly — so you’re starting off on the right foot!
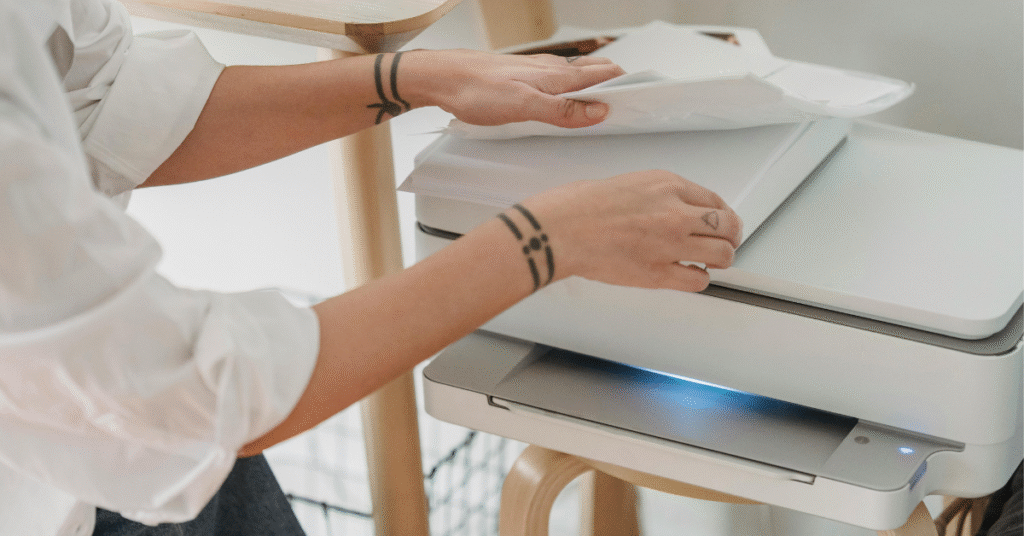
Choosing a Good Printer for Printable Stickers
Good news — “good” doesn’t have to mean expensive! When it comes to printing stickers at home, you’re looking for a color printer with solid reviews. Both inkjet and laser printers can work depending on your needs. If you’re curious about the pros and cons of each, I have a separate post that breaks them down.
Personally, I use a Canon Pixma (this is the exact model I use). It’s an affordable inkjet printer that’s easy to set up and works beautifully for printing my stickers.
Picking Your Sticker Paper
What’s the best sticker paper for printable stickers? Honestly, it depends on what you’re using them for and your personal preference. Let’s keep it simple for this guide and talk only about: matte vs. glossy sticker paper.
- Matte sticker paper feels like regular paper — any pens you normally use should work just fine on these. The colors might look a bit softer compared to glossy.
- Glossy sticker paper has a shiny, smooth surface. The colors typically come out brighter and more vibrant. Depending on the paper brand, you may still be able to write on glossy stickers with most pens, though some people find the writing experience a little slippery.
Personally, I love using Koala Inkjet Glossy Sticker Paper. The colors are beautiful, and I’ve never had any issues with my pen ink smearing when writing on them.
Prepare Your Sticker File for Printing
Whether you’re planning on cutting printable stickers with a Cricut or Silhouette, you’ll first need to upload your printable sticker files into your cutting software.
Cricut
- Open Cricut Design Space and upload your PNG file with a transparent background.
- Choose “complex” as your image type.
- Then press continue, then continue again. Select “Save as a print then cut image” then click the green “save” button.
- Sometimes you’ll need to resize your PNG with a transparent background so that the stickers are the right size before printing — don’t worry, it’s easy. For my PNG files with transparent backgrounds, make sure the ratio lock is turned on and adjust the width to 6.5 inches. (Other sellers may use a different width so just check what size they say to use for their PNGs.)
- Select your image then click “insert image.”
- Click on “make it.”
- Click the green “continue” button.
- Click “send to printer.” (See the info below for instructions on choosing print settings for high-quality printing.)
Silhouette
If you’re using a .studio3 file, all you need to do is double click on the file and it will open in Silhouette Studio.
OR
2. If you’re using a PNG with a transparent background, start by opening Silhouette Studio. Then go to “File” then “Open.” Find where you saved your PNG and double click it. It will then open on a new canvas in Silhouette Studio.
3. Sometimes you’ll need to resize your PNG with a transparent background so that the stickers are the right size before printing — don’t worry, it’s easy. For my PNG files with transparent backgrounds, make sure the ratio lock is turned on and adjust the width to 6.5 inches. (Other sellers may use a different width so just check what size they say to use for their PNGs.)
4. Whichever file type you are using, before printing, double-check that your registration marks are turned on and that your design is positioned inside them — this helps with more accurate cutting later on. You also don’t want your sticker design to be too close to the registration marks as this will confuse your machine’s scanner.
5. Then open the print window by selecting the printer icon in the menu near the top of the page. ( See the info below for instructions on choosing print settings for high-quality printing.)
Adjust Printer Settings for High-Quality Printing
Printer settings can make a big difference. Each printer is a little different, but you’ll want to set your print quality to the highest option available — often called “best” or “high.”
You’ll also want to adjust the “media type” setting depending on your paper. For glossy sticker paper, I often select “photo paper” or “glossy.” For matte paper, “plain paper” usually works well, but if you’re not happy with the results, try switching to photo paper settings to see if that improves the print quality.
Cutting Your Printable Stickers
Once your stickers are printed, it’s time for the fun part — cutting! Just like printers, the cut setting that will work best vary from cutter to cutter (and vary between what sticker paper you use, how old your mat and/or blade are etc.) The best practice if you’re completely new to your machine is to start with the lowest settings and slowly work your way up until you find one that works for you. Or you can start with a setting already programmed into your cutting software, If you’re using Silhouette, you could try the “sticker, white” setting. If you’re using a Cricut, you could try the “washi sheet” setting and change the pressure to “less” in the dropdown menu. Then you can use the results from these cuts as a baseline for any further adjustments you may need to make.
Once you’ve chosen your settings, carefully place your printed sticker sheet on your cutting mat, making sure it’s aligned properly. Load the mat into your machine. Then if your machine is a Silhouette, hit “send” in the software. If you’re using a Cricut hit the flashing go button on your machine. And just like that, you’ve successfully created your own print then cut stickers.
Check Your Cuts Before Unloading
Finding the perfect cut settings for your machine and paper may take a bit of trial and error. That’s completely normal! A helpful tip: before you unload your mat, check to see if your stickers cut cleanly through the top layer (known as a kiss cut) or all the way through (a die cut). If the cut isn’t quite right, you can send it through again without losing alignment, as long as you haven’t unloaded the mat yet.
Peel the Mat Away from the Sticker Paper
Always, always, always, peel the mat away from the sticker paper, not the other way around! If you peel the sticker paper away from the mat, it will curl, potentially damaging your stickers and making them very difficult to store!
Troubleshooting Printing and Cutting Problems
Sometimes things don’t go perfectly the first time — that’s part of the learning curve. So here are some tips for troubleshooting printable sticker printing and cutting.
- Cutting in the wrong spot? Double-check your registration marks and make sure you actually printed them onto your sticker sheet. (Believe me, even sticker cutting pros sometimes forget to turn the registration marks on before printing their stickers.)
- Machine not cutting at all? Make sure you’ve actually selected cut lines in your software (if you’re using Silhouette Studio).
- Colors look off? Check that you’ve chosen the best quality print setting and selected the right media type for your paper.
Try Manual Cutting (If You Don’t Have a Cutting Machine)
If you’re not ready to invest in a cutting machine yet, that’s totally fine! You can absolutely make printable stickers at home with just a pair of sharp scissors. A craft knife and cutting mat can also help if you want a little more precision. This is a great way to get started making printable stickers at home without the upfront cost of a machine.
You’re Ready to Start Printing and Cutting Printable Stickers at Home!
Congratulations — you’re ready to start creating your own printable stickers at home! Just take it step-by-step, and remember to start with quality sticker files.
Need a place to start? Head over to my Etsy shop where you’ll find a full collection of high-quality printable stickers, including weekly planner kits, monthly planner kits, advent countdown stickers, and journaling planner stickers.
Bonus: I’ve put together a free printable checklist to help you every time you print and cut your stickers at home. Just sign up below, and I’ll send it straight to your inbox!